Canning is a fantastic way to preserve fruits, vegetables, and even some sauces for months (or years!) to come. One of the simplest and most common methods for canning is the hot water bath, perfect for high-acid foods like jams, jellies, pickles, and fruits. If you’re new to canning, don’t worry—this step-by-step guide will walk you through the process to ensure you’re ready to preserve your harvest safely and effectively.
What You Need:
• Canning Jars: Always use jars specifically designed for canning (typically mason jars) with and new lids and bands.
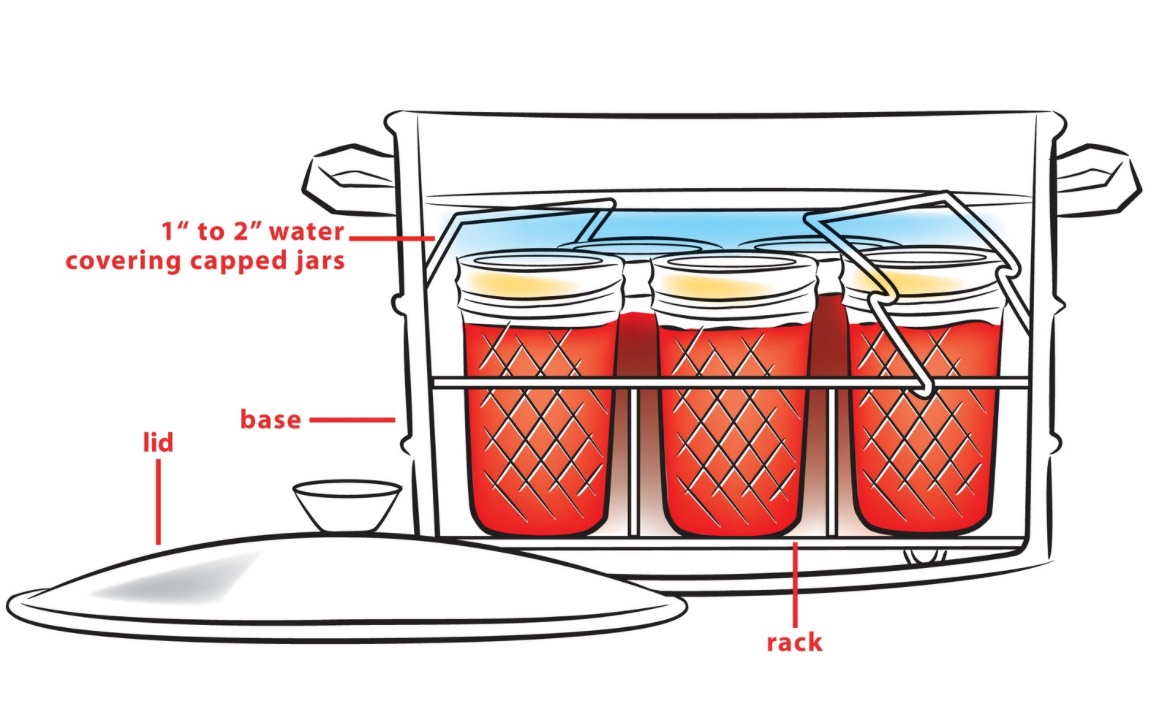
• Large Pot or Canner: A deep pot that can submerge the jars by at least an inch of water. You can buy a canning-specific pot, or use any large stockpot with a lid.
• Jar Lifter: This tool will help you safely remove jars from the hot water.
• Funnel & Ladle: To easily fill the jars without spilling.
• Clean Towels or Rags: To wipe rims and keep everything dry and sanitized.
The Process:
1. Prepare Your Ingredients:
Before starting, make sure your recipe ingredients are ready to go—whether it’s fruit for jam or cucumbers for pickles. Follow the recipe’s instructions carefully for quantities and preparation.
2. Sterilize Your Jars:
Wash your jars and lids in hot, soapy water. Then, place the jars in the hot water bath for 10 minutes to sterilize them. You can also keep the jars warm by leaving them in a simmering pot of water while you prep the food.
3. Prepare the Water Bath:
Fill your canning pot with water, making sure there’s enough to cover the jars by at least an inch. Bring it to a simmer over medium heat.
4. Fill the Jars:
Use your funnel and ladle to fill the prepared jars with your hot food or liquid, leaving about ½ inch of headspace at the top. Wipe the rims clean with a clean towel to remove any food residue, which ensures a proper seal.
5. Seal the Jars:
Place the lids on the jars and screw on the bands until they’re finger-tight. Don’t over-tighten them—this can prevent proper venting during the process.
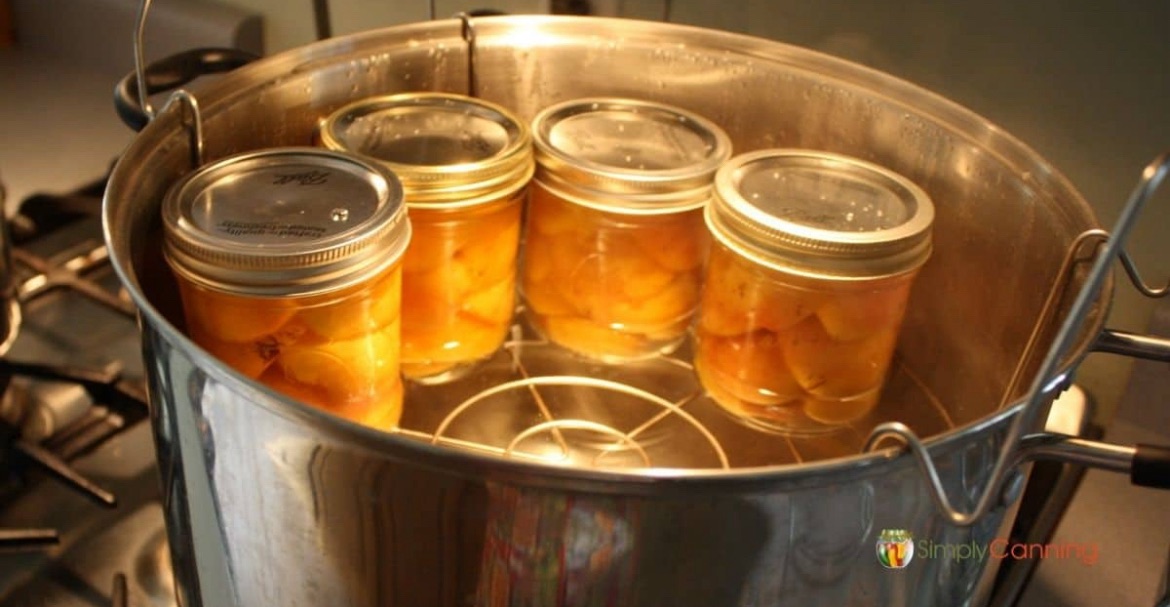
6. Submerge Jars in the Water Bath:
Gently lower the filled jars into the hot water bath using the jar lifter. Make sure they’re fully submerged, with at least an inch of water covering the tops of the jars.
7. Process the Jars:
Bring the water to a gentle boil and let the jars process according to your recipe. Processing times can vary, most foods need only 20 minutes. But some may need 5 to 30 minutes depending on the food you’re canning. The food inside needs to reach the proper temperature to kill off any bacteria, yeasts, or molds.
8. Cool and Check the Seals:
Once the processing time is complete, carefully remove the jars from the water. Place them on a towel to cool for 12-24 hours. You’ll know the jars are sealed when the center of the lid has a slight indentation, and you can press it without it popping back up.
9. Store Your Canned Goods:
Once cooled, remove the bands and check the seals. If any jar hasn’t sealed properly (the lid pops when you press on it), you can reprocess it or store it in the fridge. Store your sealed jars in a cool, dark place, and enjoy your preserved food months down the road!
A Few Tips for Success:
• Always follow trusted recipes to ensure the right acid-to-sugar ratio, as this impacts both safety and flavor.
• Don’t overcrowd your canning pot—jars should be able to move slightly during processing to ensure even heating.
• If you’re new to canning, start with small batches to gain confidence before preserving larger quantities.
• Always check seals before using canned goods. If a jar seal is compromised or if the food looks or smells off, discard it.
Canning is a rewarding way to extend the life of your homegrown produce or favorite recipes. With a little practice, you’ll be able to preserve delicious foods all year long!
Affiliate Link: